The springs on a garage door do the lifting, and the cables pass that lift to the door. When a spring breaks or a cable comes loose, the door gets its full weight back, and the parts that are left can still be under heavy load. So the short answer for this whole section: you look, from the floor, with the door closed; a trained door technician does the work. The guides below explain each part, what you’re seeing when something goes wrong, who does what, and what to ask a technician.
Stop first if something just broke
- Don’t run the door, by the opener or by hand, after a bang, with a gap in a spring, or with a cable hanging loose. Genie’s 2024 opener manual: “DO NOT operate a door that jams or one that has a broken spring” (Genie manual 42598.02135, 10/2024, p. 2).
- Don’t pull the emergency release on an open door. The federal rule makes every opener manual carry this warning: “if possible, use the emergency release only when the door is closed. Use caution when using this release with the door open. Weak or broken springs may allow the door to fall rapidly, causing injury or death.” (16 CFR 1211.16(b)(2), item 6)
- Keep people, pets and cars clear. “NEVER GO UNDER A STOPPED PARTIALLY OPEN DOOR.” (16 CFR 1211.16(b)(2), item 4)
- Don’t touch the springs, cables, drums or the brackets at the bottom corners of the door. Look only.
- Call a trained door technician, and say whether the door is closed, open or stuck part way.
General information, not professional advice. Your door’s maker, your opener manual and a trained door technician decide what’s safe for your door, and local codes decide what needs a permit.
We recommend no door company, technician, product or brand; makers appear only as the authors of documents we quote.
How springs and cables lift a door
DASMA, the door and opener makers’ trade association, calls the springs a counterbalance system: “A system which counteracts the weight of a garage door to allow a reduced force to open and close the door” (DASMA TDS-160, rev. 1/19). That weight is real. DASMA says doors “can weigh anywhere from 90 pounds to over 500 pounds” (TDS-176, reaff. 6/19).
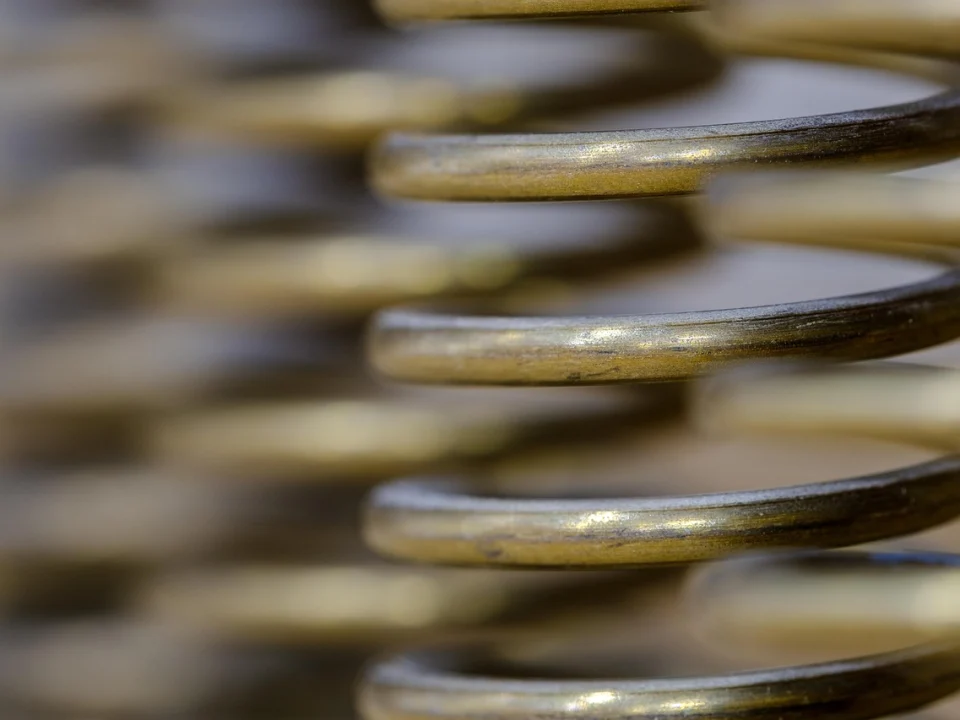
Homes use two kinds of spring, told apart from the floor (DASMA TDS-167, rev. 4/23, item 3):
- Torsion springs sit on a steel shaft across the wall just above the door opening and twist. As the door rises, the shaft turns a grooved cable drum at each end, which winds the lifting cables on. The shaft also holds a broken spring in place.
- Extension springs run along the ceiling above each horizontal track and work by stretching. A separate containment cable, often called a safety cable, should run through the centre of each one so the pieces stay put if it snaps.
Either way, the lifting cables end at the bottom brackets, the fittings at each bottom corner of the door, and the whole system holds the most energy when the door is closed. That’s why every check here is done by eye, with the door down. Our guide to torsion vs extension springs shows both from the ground, odd cases included.
Who works on springs and cables
The line starts in federal law. Every residential opener made on or after 1 January 1993 must come with instructions carrying set warnings, and one of them is about this hardware:
“KEEP GARAGE DOOR PROPERLY BALANCE. See user’s manual. An improperly balanced door could cause severe injury or death. Have a qualified service person make repairs to cables, spring assemblies and other hardware.”
16 CFR 1211.16(b)(2), item 7, eCFR, read 10 November 2026 (“BALANCE” is the rule’s own spelling)
The makers we read say the same in stronger words. Chamberlain’s 2013 manual for the PD612EV and HD420EV: “NEVER try to loosen, move or adjust garage door, door springs, cables, pulleys, brackets or their hardware, ALL of which are under EXTREME tension.” Genie’s 2024 manual: “Repairs and adjustments to cables, spring assembly and other hardware must be made by a trained service person using proper tools and instructions.” Clopay, a door maker: “Standard torsion spring repair is not a DIY project”.
There are two narrow exceptions, each tied to a maker’s own instructions. Clopay says owners can install or adjust its own EZ-SET torsion system with a 3/8-inch power drill, by Clopay’s instructions for that system (Clopay safety checklist). And a 1996 safety leaflet from the CPSC, the National Safety Council and the industry allowed “a mechanically experienced person carefully following the manufacturer’s instructions” to adjust extension springs, while saying torsion springs “should only be adjusted by a professional”; the current opener manuals and DASMA’s sheets make no such exception. What replacing torsion springs involves explains the technician’s job without steps, and extension springs and safety cables shows how to check for the containment cable.
Where to start
A loud bang, and the door won’t lift
That’s the classic sign of a broken garage door spring. Clopay describes the sound as a very loud bang and says a broken torsion spring “splits into two separate pieces”, leaving a distinct gap in the coil you can often see from the floor.
A cable hanging loose, or a crooked door
A snapped or loose garage door cable means the door has lost lift on that side. Clopay warns that when cables “fray or break, the door can drop unexpectedly or become stuck”.
Nothing is broken: the monthly check
The owner check for springs is the garage door balance test. With the door closed and nothing visibly wrong, pull the opener’s release, lift the door by hand to about 3 to 4 feet and let go. Genie’s manual says it “should remain stationary or slowly drift closed”; if it opens or closes rapidly, call a trained technician (Genie manual, p. 21). Then reconnect the opener and run the monthly reverse test from our garage door safety guide, with “a 1 1/2 inch object (or a 2 by 4 board laid flat) on the floor” (16 CFR 1211.16(b)(2), item 5).
Writing the spring down for a technician
A spring size chart isn’t something to pick a replacement from. DASMA’s colour chart says it “should not be used by homeowners or maintenance personnel to replace garage door springs”, and that colour gives “only partial identification” (TDS-171). Our spring identification and record tool turns what you can see from the floor and what your old invoice says into one page for the technician. It records a spring; it never sizes or picks one.
How long springs last
Springs are rated in cycles, not years. Clopay says “Most garage door springs are designed to last 10,000 cycles”, and DASMA defines a cycle as fully closed to fully open and back to fully closed (TDS-160). At 4 cycles a day, 10,000 cycles is about 6.8 years by our arithmetic; at 8 a day, about 3.4. DASMA’s TDS-190 lists why real springs differ, from added weight to weather and corrosion. The spring cycle-life estimate does the sum for your door, as an estimate, not a promise.
You check, stop, technician
You check (look only, door closed)
- Spring type and count, any gap or hanging spring, and a cable through each extension spring (TDS-167, item 3).
- Cables slack, frayed or off a drum, and whether the door sits level.
- With nothing wrong: the balance test, then the reverse test.
Stop
A bang, a gap in a spring, a loose or frayed cable, a missing containment cable, a door that is crooked, off its track or heavy, or a door that falls, shoots up or won’t stay put in the balance test. DASMA’s checklist: if any answer is “No”, stop and contact a trained door systems technician (TDS-167).
Technician
Identifies the springs against the door maker’s figures, replaces what’s broken, sets the turns the door maker’s instructions give (TDS-190), checks cables, drums and bottom brackets, then checks the balance and reruns the reverse test.
What to write down and ask
Before you call, write down what happened, where the door is now, the spring type and count, any paint colour, the door size and the opener’s model and date label (openers made since 1 January 1991 carry it, 16 CFR 1211.19). Then ask:
- Both springs or one? Clopay recommends both on a two-spring door.
- What cycle rating are the new springs? Ask for it on the quote.
- Did you check both cables, both drums and both bottom brackets? On extension springs, does every spring have a containment cable?
- Can you show me the balance test and the reverse test before you leave?
Your next step
If something has just broken, leave the door where it is, keep everyone clear and start with the broken spring or loose cable guide above. If nothing is wrong, check which springs you have with a flashlight, then do the balance test this month. What can’t wait: a broken spring with the door open, a loose or frayed cable, or a door that won’t reverse.
Sources checked on 10 November 2026: 16 CFR 1211.16 and 1211.19 (eCFR); DASMA TDS-160, TDS-167, TDS-171, TDS-176 and TDS-190; Genie manual 42598.02135 (10/2024) and the 1996 insert in Genie’s ©2017 manual; Chamberlain’s PD612EV/HD420EV manual (2013); Clopay’s safety checklist and spring and cable pages.